Posting testimonials on Instagram is a great way to distribute original, authentic, and engaging customer stories about your business.
On Instagram, you can post testimonials as:
- A standard post. You can post a single image or a carousel of images (currently up to 10 images are allowed). This is the best method for posting if you’re sharing written testimonials.
- A reel. You can share a reel, which can be a video or montage of images that can be as long as 90 seconds. Reels are a great way to share video testimonials. Video testimonials are often more engaging than written testimonials, and can do a better job of connecting with your target audience.
- A story. A story can either be a static image or a video. When you post a story it’s a great way to call attention to a new testimonial you want to share. It does disappear from your page after 24 hrs, but you can save it as a story highlight. For example, you can create a category of story highlights just for customer testimonials. When someone comes to your Instagram page they can see all your testimonials in one area.
But where businesses tend to struggle is in collecting testimonials and easily sharing it to their company branded Instagram account. If you’re creating video testimonials, you need to get your customer to record their story, edit their recording for Instagram (this includes trimming it to the right size, adding logos, and other branded features) and storing all of this data on a work computer or phone so you can then upload it to Instagram.
This is where Vocal Video comes in. With our platform, you can…
- Get more testimonial videos directly from your customers.
- Edit them automatically so they fit perfectly into your Instagram profile.
- Download them so you can easily add them to Instagram from your phone, the Meta Business Suite, or your social media management platform.
Here, we’ll cover the basics of posting a testimonial on Instagram with some great examples from our customers. We’ll also show you how to get more content so you can post more regularly, and discuss some essential strategies for showcasing your best reviews to your target audience.
Vocal Video is an end-to-end video testimonial tool that creates stand-out customer story videos for social media, your website, or your recruitment strategy. Try our free-forever plan today.
Instagram Testimonials: 3 Ways to Post
Like every social network, Instagram has its own terminology to get your head around. This includes three different ways to share content with your audience: Posts, Reels, and Stories.
Let’s start with a quick rundown of how to post each one — including a quick tutorial and examples of how real Vocal Video customers have shared positive feedback in testimonials on Instagram.
1. How to Make an Instagram Testimonial Post
Instagram Posts are the classic, square-format images you’ll see on someone’s grid or when you scroll through your feeds. At the time of writing, Instagram lets you add up to 10 photos or short video clips per post, which your audience can swipe through in a carousel.
Vocal Video customers LivePerson have used the classic Post format to share testimonials from their employees.
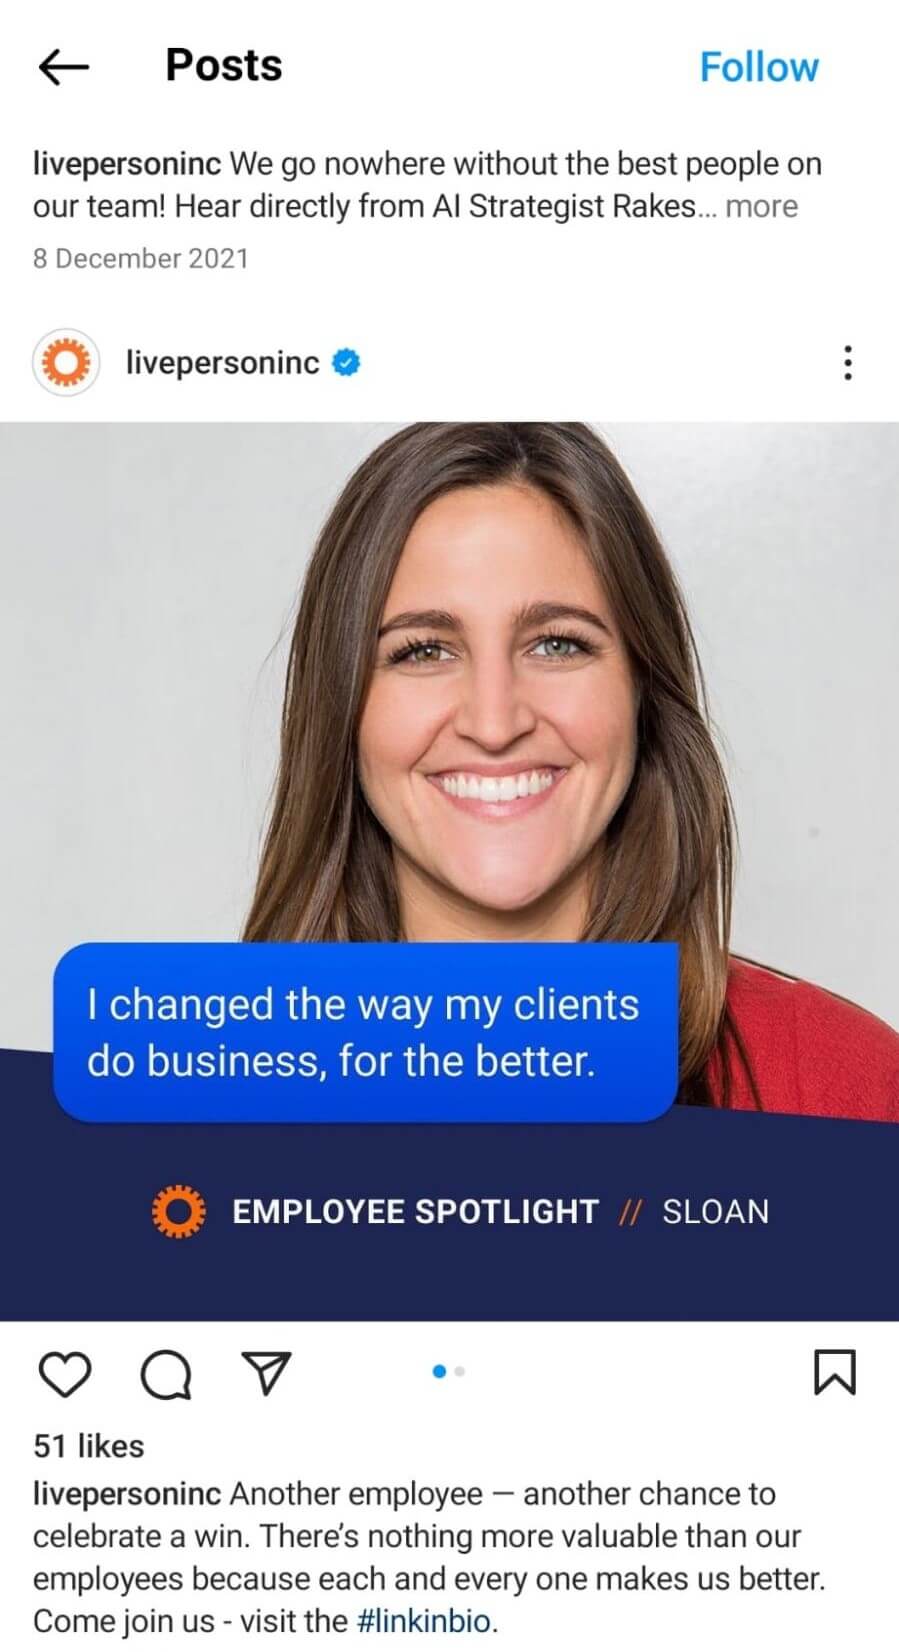
These posts are effective because the colors and logo easily associate them with a trusted brand. They also look polished and professional because every Post in the series uses the same elements. But by putting the face of the employee and a direct quote at the heart of the Post, they’re also completely relatable, which draws the audience in.
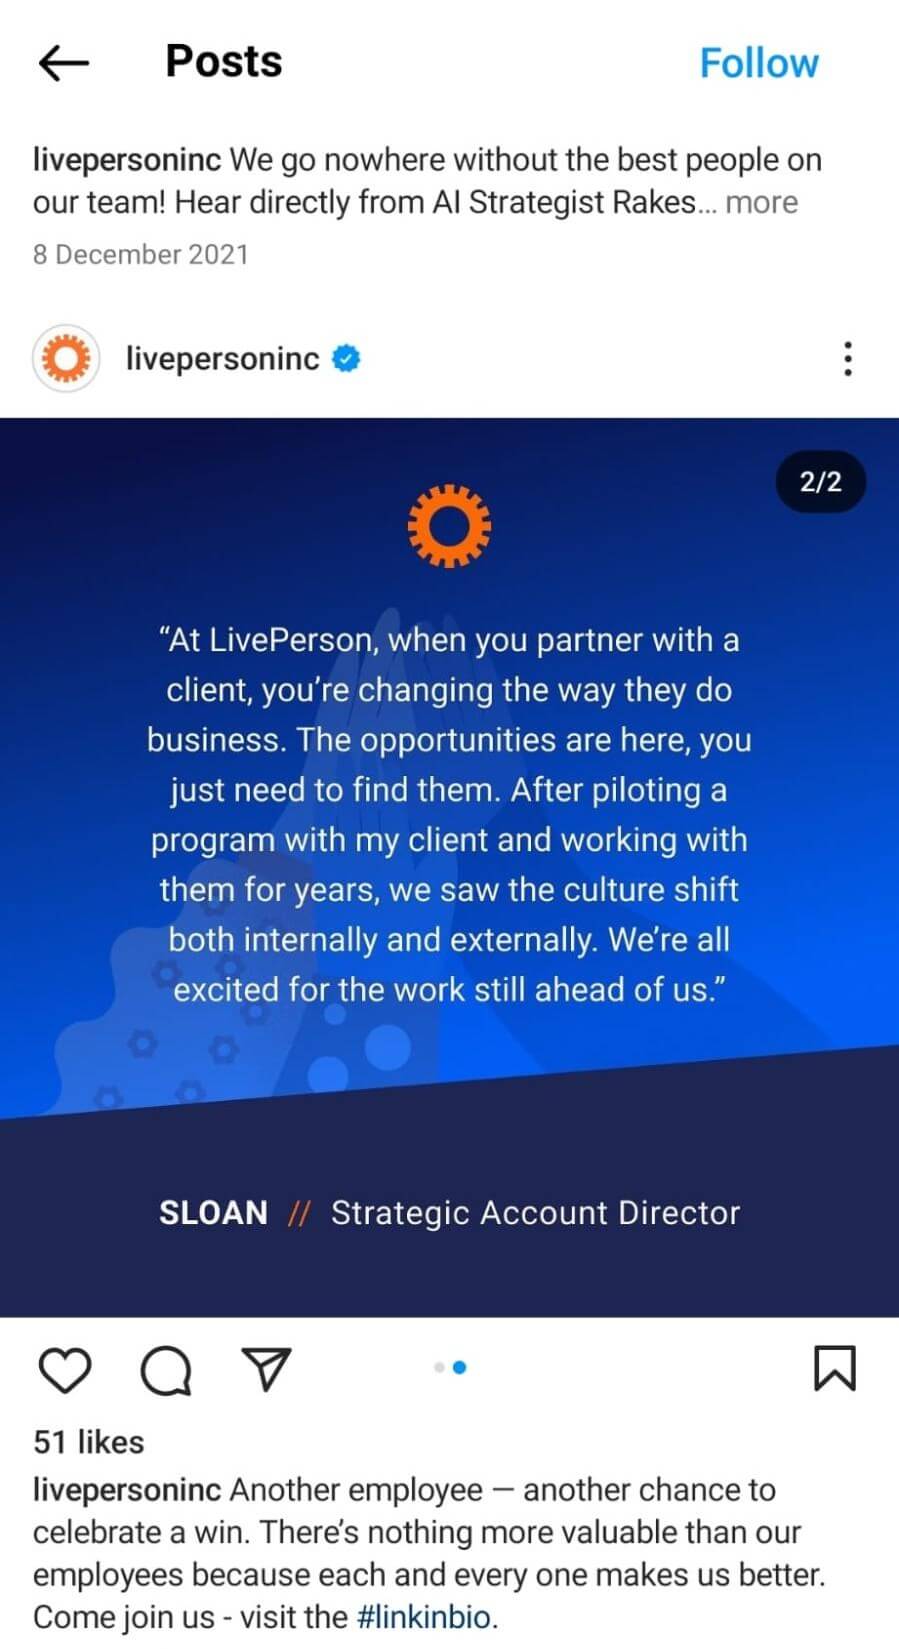
By choosing a teaser for the first image and using the full testimonial in the second, LivePerson also keeps the viewer engaged for longer, so they have more time to scroll through the testimonial post and internalize the message.
To make a Post like this for your business:
- Click the “+” button at the bottom of your Instagram screen.
- Make sure you’re looking at the “Post” option rather than “Reel” or “Story”.
- Choose the photo or video you want to share, or click on the camera icon to take a new picture.
- Click “Next” and decide whether you’d like to edit the photo or add music.
- Add a caption and location, and tag the people who appear in the photo or video.
- Share the Post with your followers.
Remember, you can turn Posts into pay-per-click ads for your business by “boosting” them through the Meta Business Suite. Here, you set a budget and the length of time you want your ad to run, and your budget is used up gradually when someone clicks on your post to find out more.
It’s also worth noting that the graphics in LivePerson’s Post were created using an external design platform and not within Instagram itself (where the editing features are limited to trimming, tuning, filters, and stickers). Some businesses will take a screenshot of a Tweet or LinkedIn post and post it to Instagram, but we find that testimonials do much more to build recognition when they’re formatted as branded graphics.
If you don’t have access to a team of designers and you don’t have time to learn, for example, Adobe Creative Cloud, platforms like Canva offer testimonial templates specifically designed for Instagram.
2. How to Make an Instagram Testimonial Reel
Instagram Reels are portrait-format videos, which can be up to 90 seconds long. When people browse your page, they can toggle between your Reels and your grid, and new users can discover your Reels when they’re shown as suggested posts.
Here’s an example of a Reel from a client at the Dr Victoria Skin Clinic, collected and edited 100% with Vocal Video.
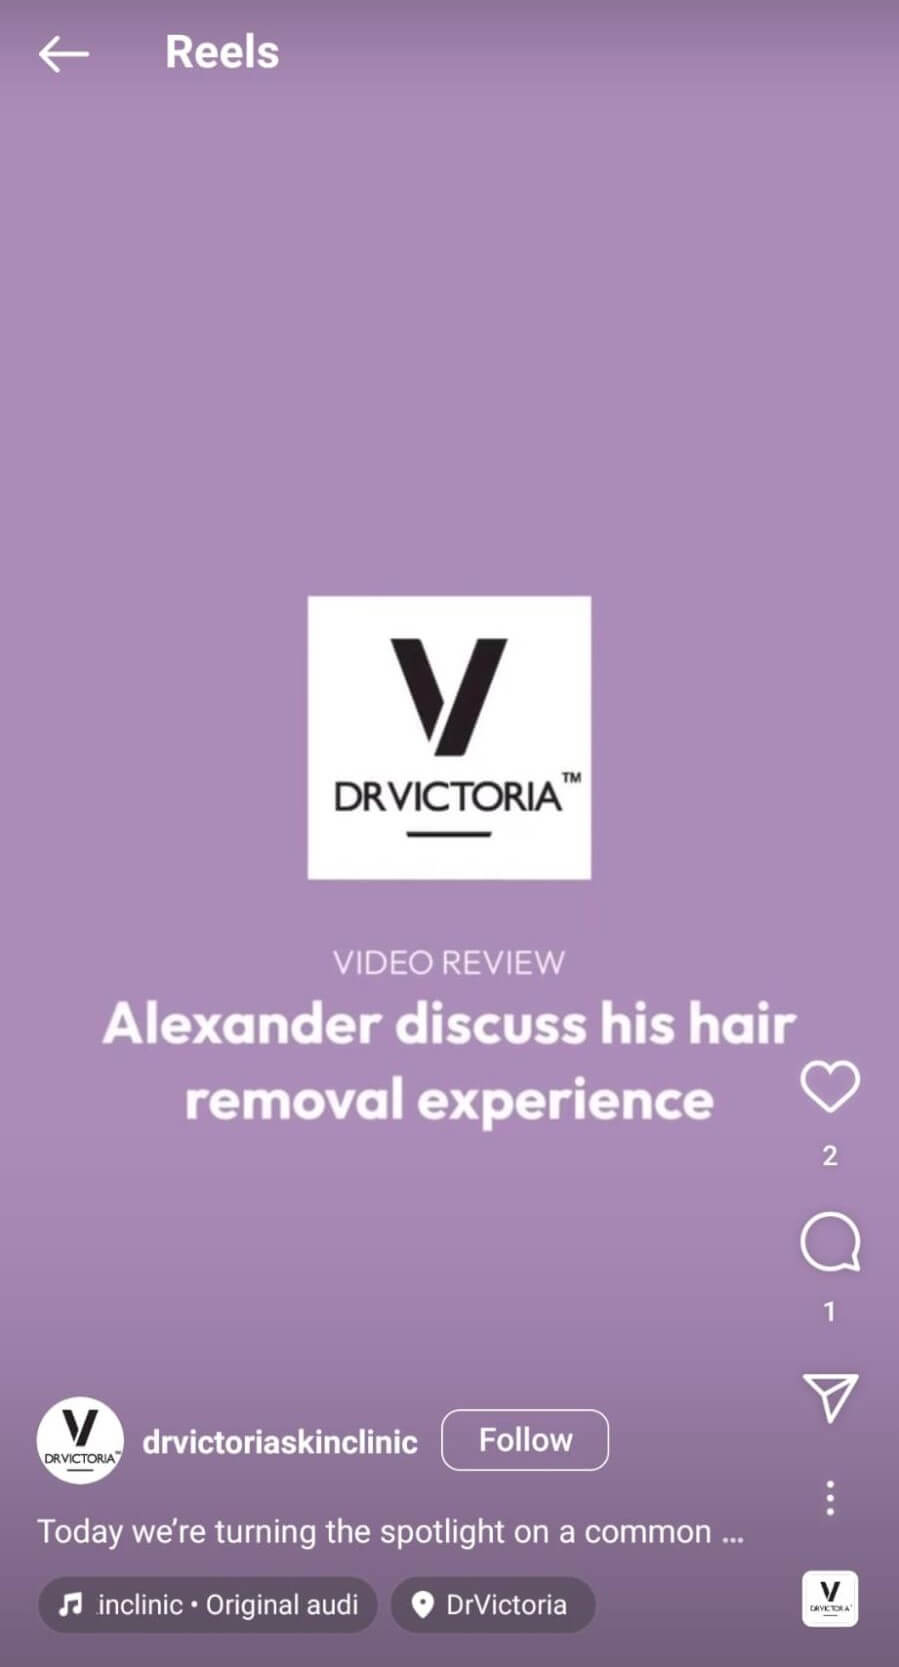
A Reel is a very effective format for a testimonial. Instead of simply reading content produced by the company’s marketing department, the viewer has 90 seconds to watch someone they can relate to speak about the benefits in their own words. They see the body language, hear the tone of voice and, in the case of a service like Dr Victoria offers, see the results for themselves.
You can make Reels by recording within Instagram or adding footage and still images from your gallery.
- Go to “+” and slide across to “Reel”.
- Record or select the video you want to use. You can also choose photos and videos to add to a template that includes pre-set music and transitions. At this stage, you can also explore Instagram’s editing features, such as adding text, stickers, and music.
- Click “Next” to add the caption and location, and tag anyone who appears in the video or who was involved in making it.
- Share the Reel or save the draft to publish later.
When you’re putting Reels together, it’s worth remembering that the video will take up the viewer’s entire phone screen. Make sure the subtitles are placed somewhere they won’t be obscured, and write a caption that grabs someone’s attention in the first line.
3. How to Make an Instagram Testimonial Story
Instagram Stories are portrait-format pictures and video clips that disappear after 24 hours — unless you save them under a “Story Highlight” on your page. Businesses often use them to post more informal content, repost content and shoutout to their customers, or tell their followers they’ve published a new Post or Reel.
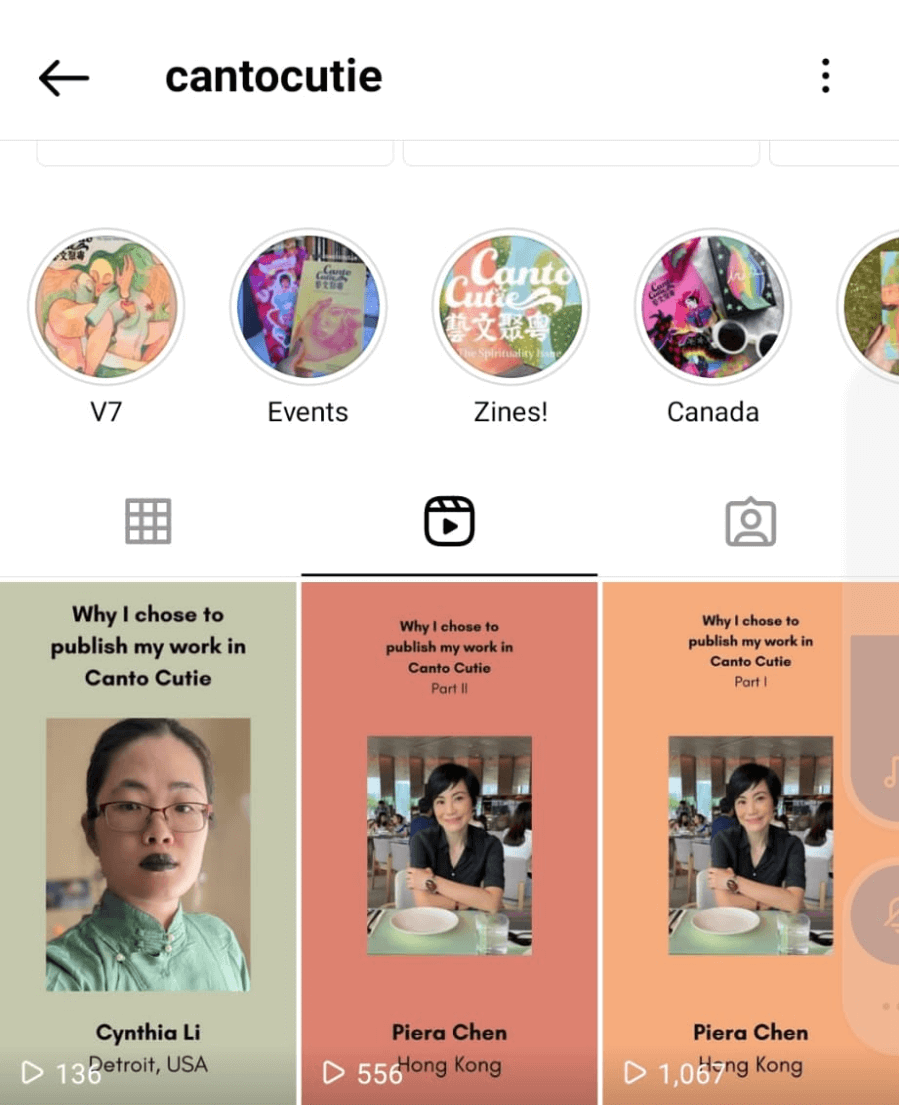
You can see the list of Story Highlights on the feed from the art and literature zine, Canto Cutie. When there’s a new Story to view, it also shows up as a pink circle around the page’s avatar, which is then pushed to the front of the Story queue for the people who follow them.
To make a story:
- Go to “+” and choose “Story” (or click on your avatar to go straight there).
- Record or select your content and add stickers or effects to get the look you want.
- Post the slides to your Story (for everyone) or to the people you’ve added to a list of close friends.
And, when you want to save a Story to Highlights, start by creating a Highlight by going to your profile, choosing one of the stories to act as the cover, and naming it. Then, when you have a Story you want to add, select it, click on the Highlight, and then click “Done.”
Businesses can also pay to boost their Instagram Stories. Although the Story will expire on your profile after the usual 24 hours, it will continue to be shown to new users as an ad for the rest of the campaign length you set.
One of the most effective ways to increase your business’ reach on Instagram is to collect more, fresh testimonials and post them regularly. Hearing about the benefits of your product or service time and again from relatable customers will deepen your audience’s understanding of your brand, build trust, and promote loyalty.
For example, check out Knowadays’ striking, instantly recognizable grid.
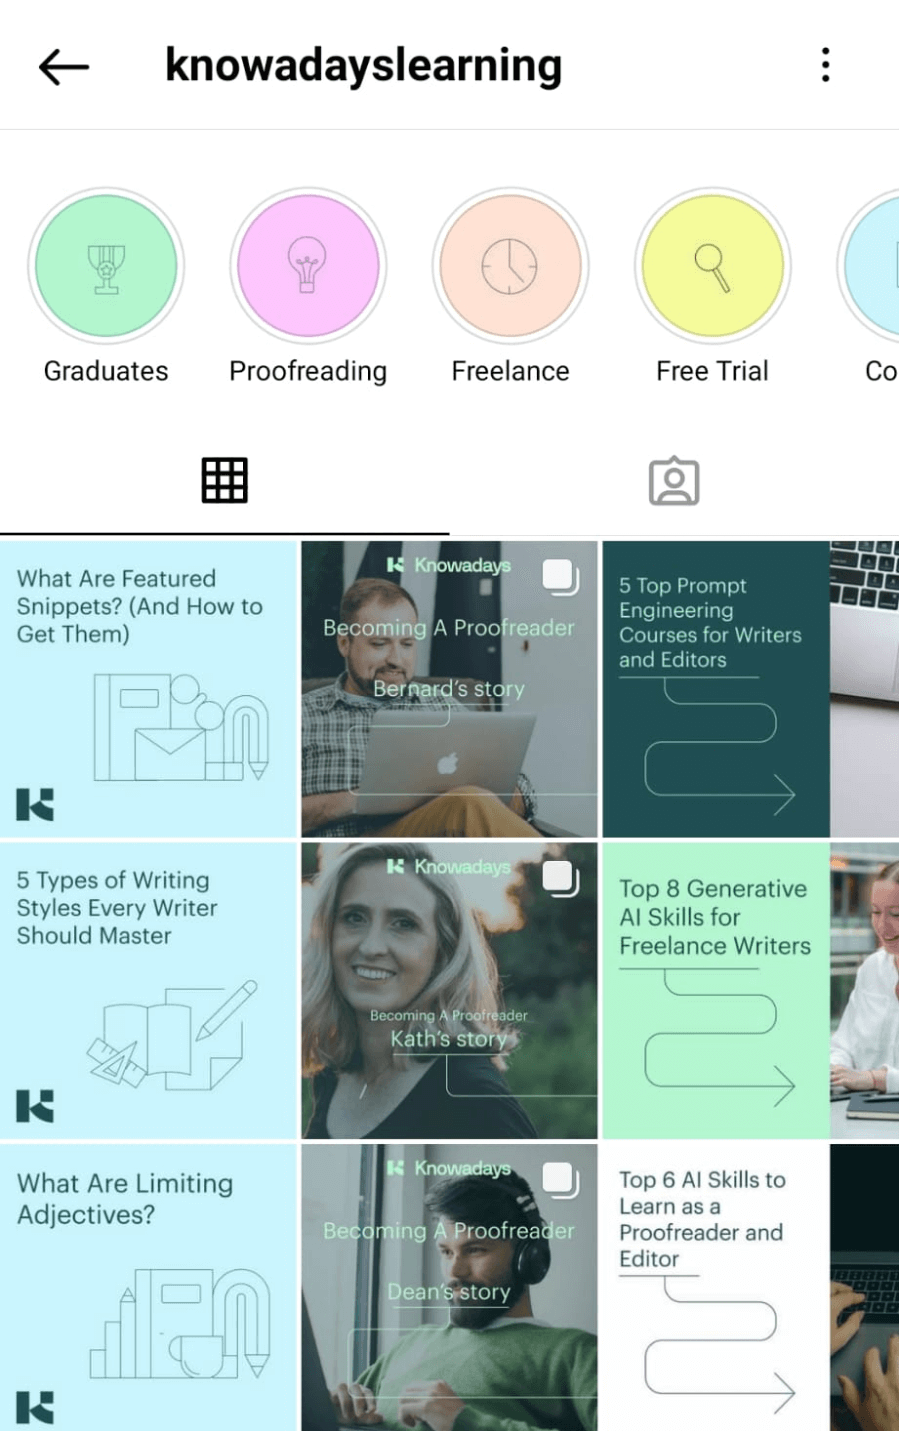
Every third post is a testimonial from a real graduate who benefited from their proofreading training program. This volume of social proof, balanced with more information about the courses and the industry, creates a highly convincing gallery that invites the visitor to scroll, browse, and find out more.
With Vocal Video, it’s easy to build a library of eye-catching, authentic testimonials to use on social media.
Your customers simply record their testimonials on their smart devices, and our automatic editing process creates videos perfectly formatted to stand out online — even if you’ve never created video content for platforms like Instagram before.
Here’s the easiest way to get more testimonials and build a similar Instagram page for your brand.
Build a Video Collector
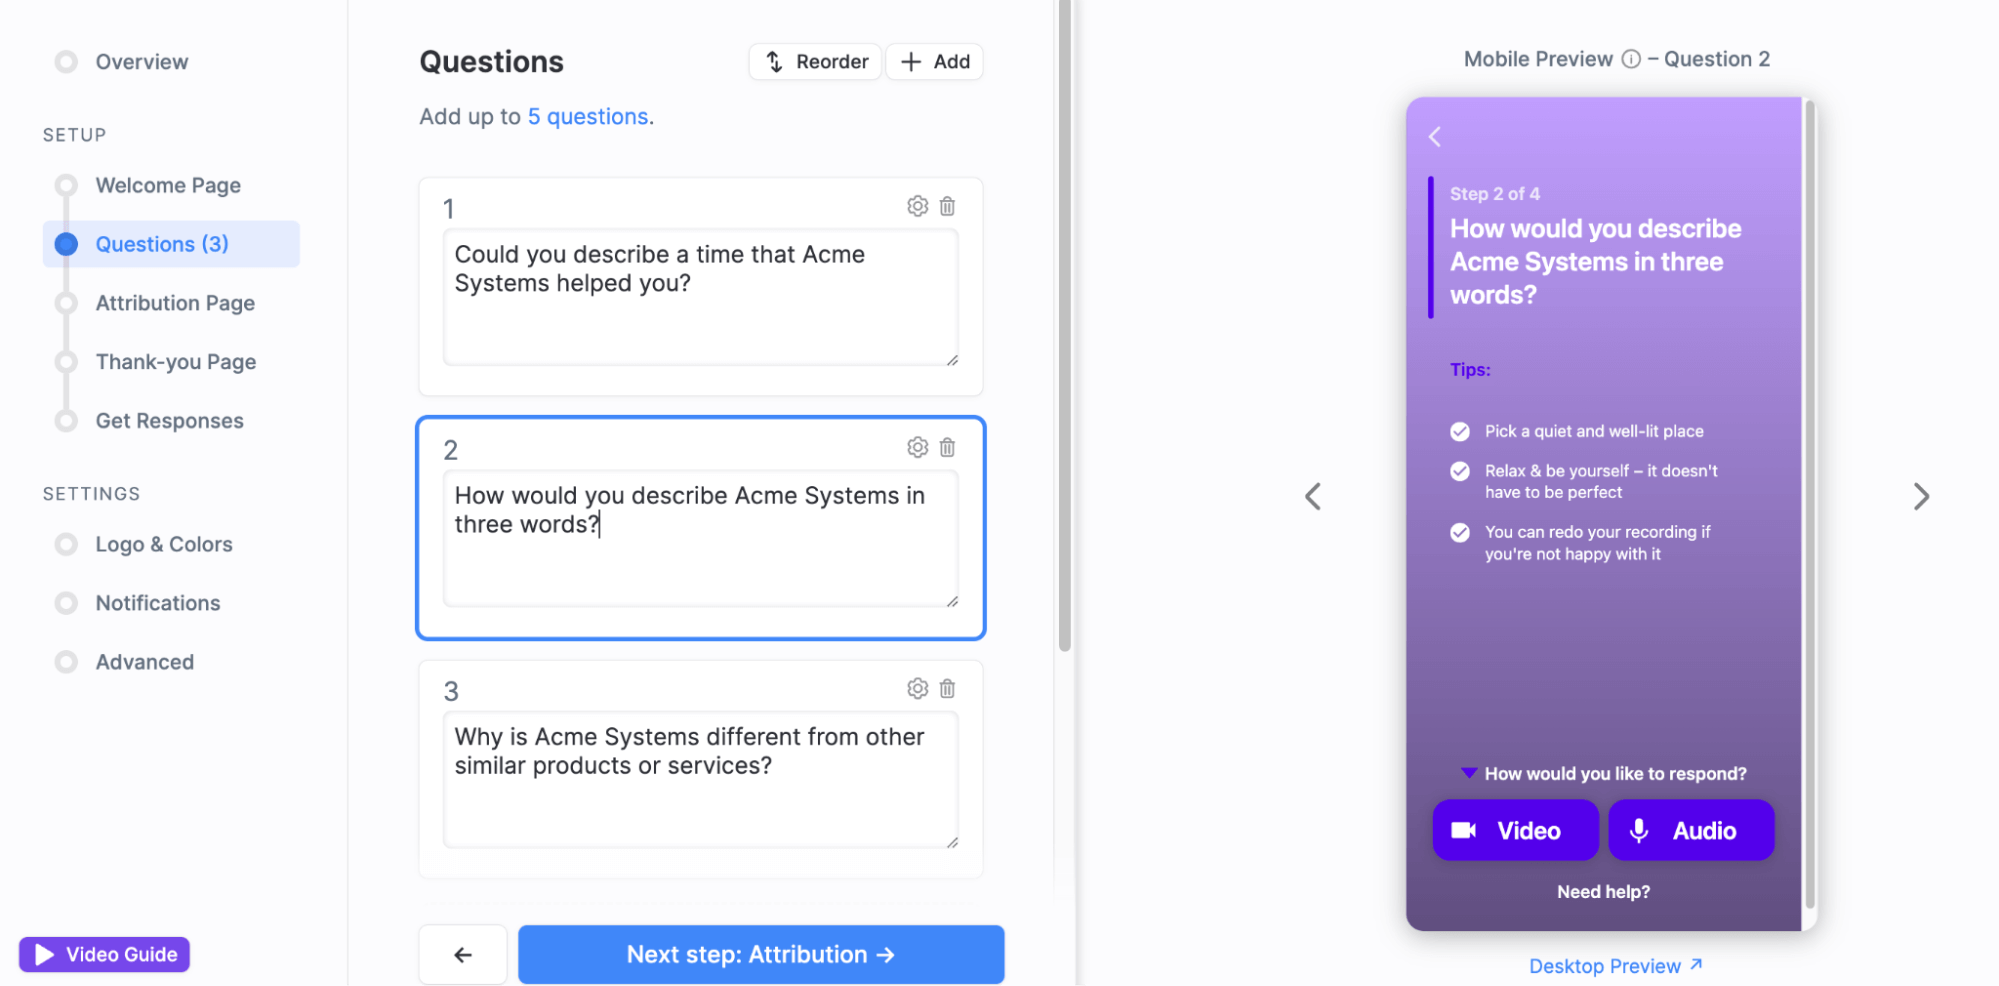
Every Vocal Video testimonial starts with a video collector. This is where you’ll thank your customers for sharing their stories, create the testimonial questions they’ll respond to, and set the brand elements we’ll add to your video during the automatic editing process.
It’s easy to build a video collector from scratch — just follow the steps to create your welcome message, write your prompts, add your logo and branding, and tell your customers how much you appreciate their time.
You can also get started with a customizable video testimonial template, available on every Vocal Video plan. For testimonials, we recommend:
- Customer Testimonials: Our most popular template asks customers to describe their experience of your business and explain why it stands out against your competitors.
- Influencer Videos: This template collects endorsements from well-known figures in your field. It’s perfect for social media testimonials, where influencer marketing can boost your brand by putting your product in front of your collaborator’s audience, too.
- Beneficiary Testimonials: One of three non-profit testimonial templates, this collector gets authentic, relatable stories from the people your organization has helped, whenever they feel ready to share their experience.
- Patient Testimonials: This template is a great place for healthcare professionals to start when they want to use memorable testimonials, or even before-and-after videos, in their content marketing.
- Employee Testimonials: Whether you use them in recruitment marketing or to give your potential customers a glimpse behind the scenes at your business, employee-generated content can act as proof that your company lives out the values they write about online.
Note: You can read much more about the benefits of employee testimonials for recruitment in this post: Building the best employee testimonial platform wasn’t our plan. Here’s how we did it anyway.
Once you’ve written or customized your collector template, go to “Get Responses” and generate a link to send to your followers.
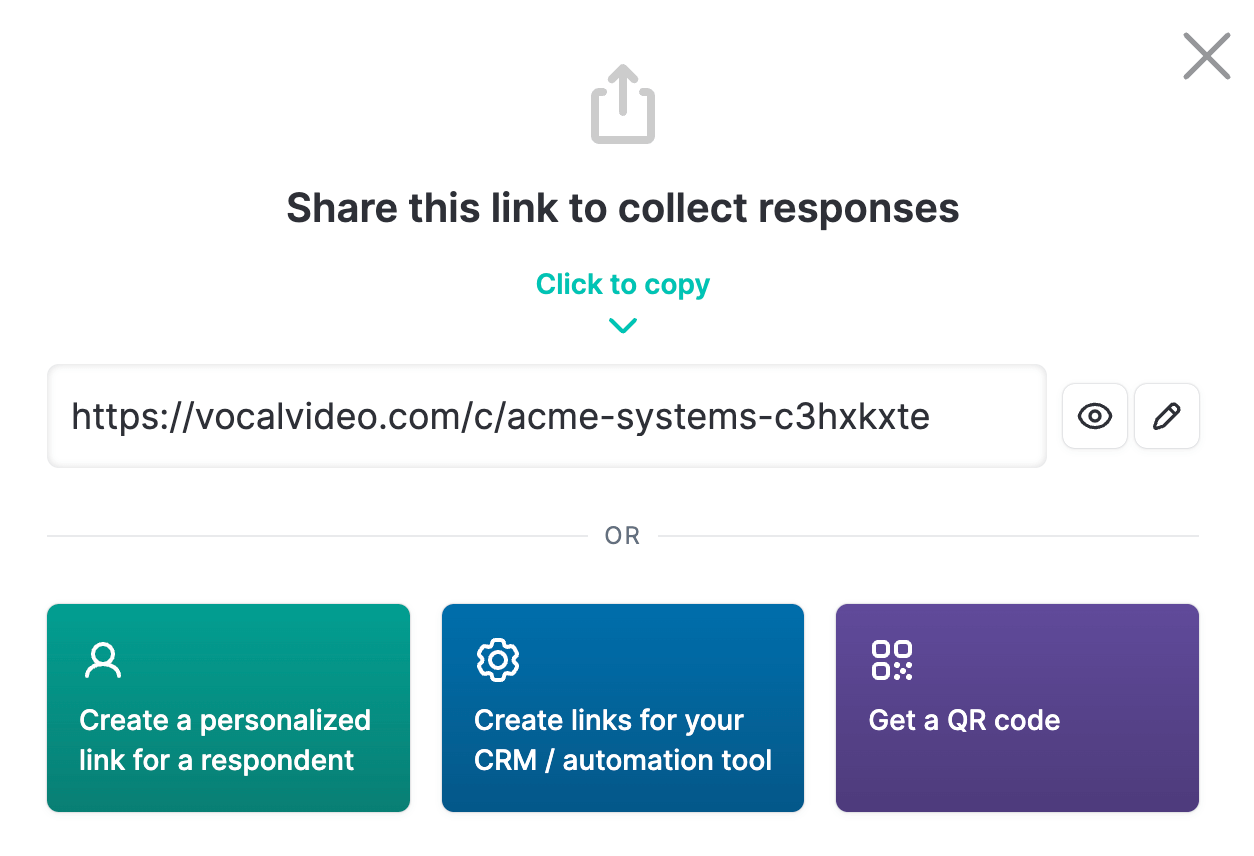
Share the Collector
Vocal Video collectors are cloud-based, so anyone can open the link and record their response on the smart device they use every day. They won’t have to schedule an interview, download an app, or create a Vocal Video account to take part, which is perfect if you’re asking people to share their stories spontaneously for your social media posts.
This also gives you several ways to ask people to record a testimonial…
- Drop the link into your newsletter, along with an invitation for your subscribers to head to Instagram, follow your page, and record their own customer experience.
- Add the link to your website, for example, at the top of your customer stories page.
- Put the link in the bio of your Instagram profile, and tell people where they can find it in the caption under all the testimonials you post.
When you use all these strategies to let your happy customers know how much you want to share their stories, your testimonial library should quickly start to grow.
Get Automatically Edited Responses
At Vocal Video, we’re on a mission to make testimonial content creation quicker, simpler, and more affordable. One of the ways we do this is with our unique automatic editing feature, which means anyone can produce an engaging, accessible video without calling in the pros.
When your goal is scroll-stopping content, automatic editing includes some fantastic features to help. For example, we include…
- Your organization’s logo and brand colors, so your video is instantly recognizable
- Dynamic animated transitions between the speaker’s responses to each testimonial question
- Automatically generated subtitles so your audience can learn about the customer’s experience, even if they’re watching without sound
- Upbeat music from our library of royalty-free tracks
- An overlay with the speaker’s name and position for added credibility.
You can see some of these automatic editing features in action in these clips from Vocal Video users:
When you want to share customer testimonials across your social media platforms, it’s also essential that the video looks like it belongs on the network where you’re posting it. Dropping content from one short form video site to another can sometimes look unprofessional, especially if it means the video is in the wrong aspect ratio or if it cuts out before the end.
Alongside automatic editing, Vocal Video includes a suite of intuitive editing tools that make it easy to format your videos for Instagram or repurpose content you created for another channel.
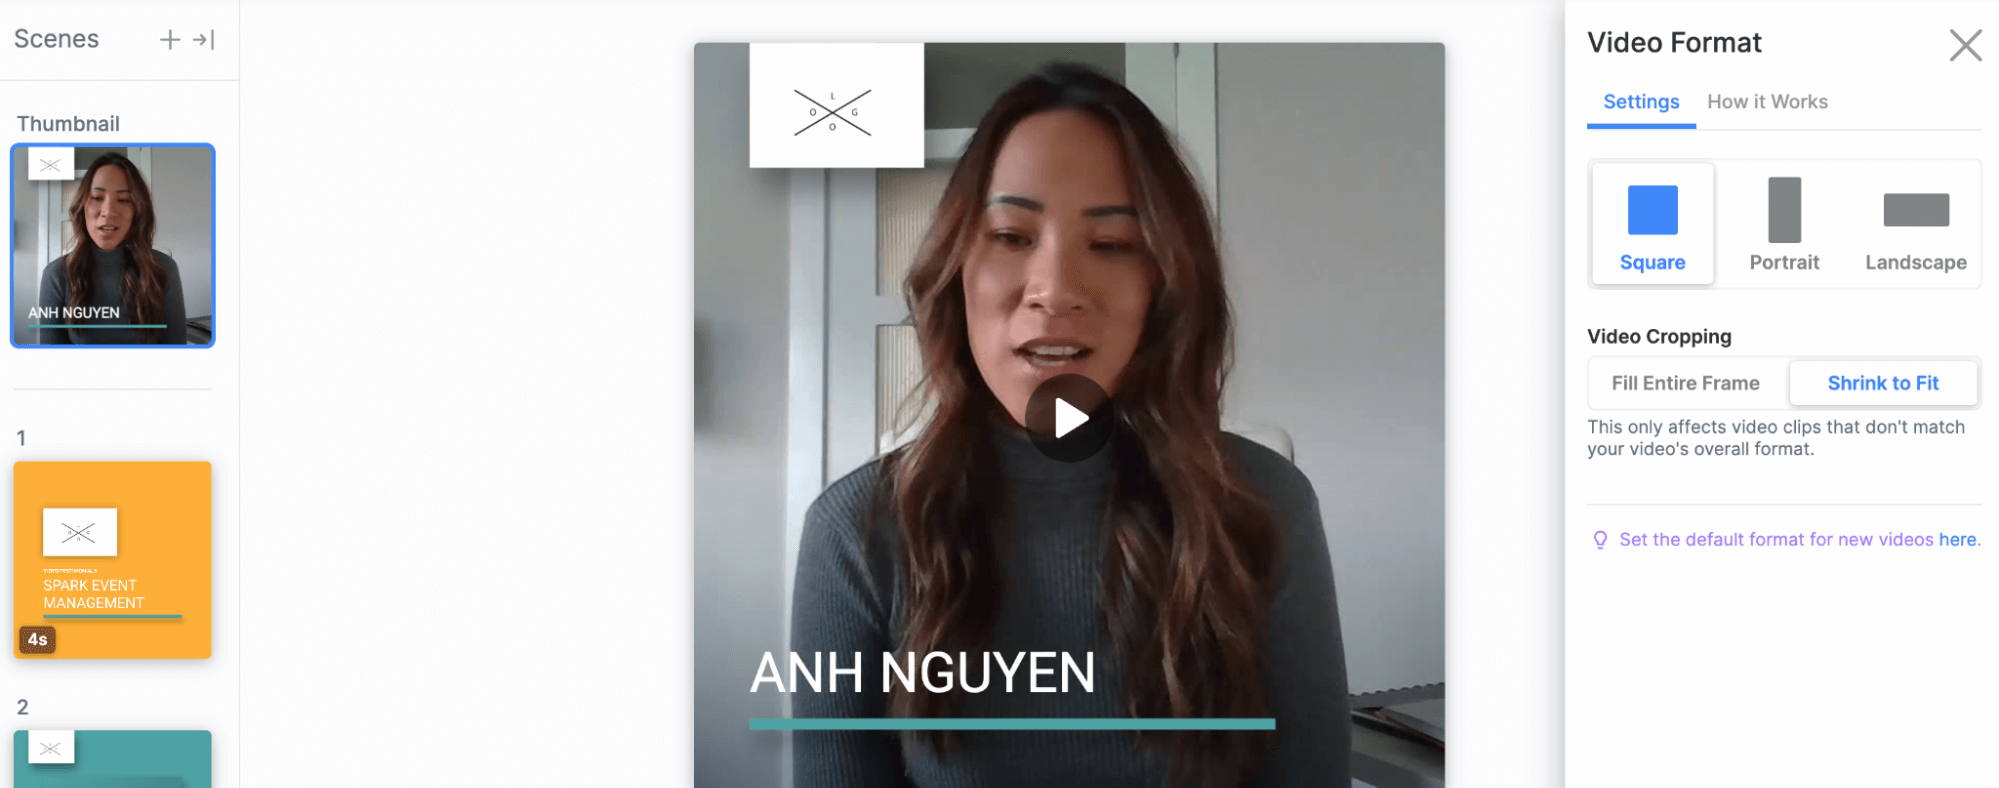
For example, you could create two different versions of a testimonial, one in portrait format for a Reel and another in a square format for your grid Post.
Simply open the video, go to “Video Format,” and choose the layout you need. You can also trim the length of your video by clicking on a scene and using the slider tool to adjust the duration.
Remember, whenever you publish a testimonial with Vocal Video, we’ll also generate a full transcript for you to download. If you want to create a testimonial graphic to use alongside your video, this makes it easy to find the most intriguing quote and paste it into a template for an eye-catching testimonial graphic.
Post Your Video to Instagram
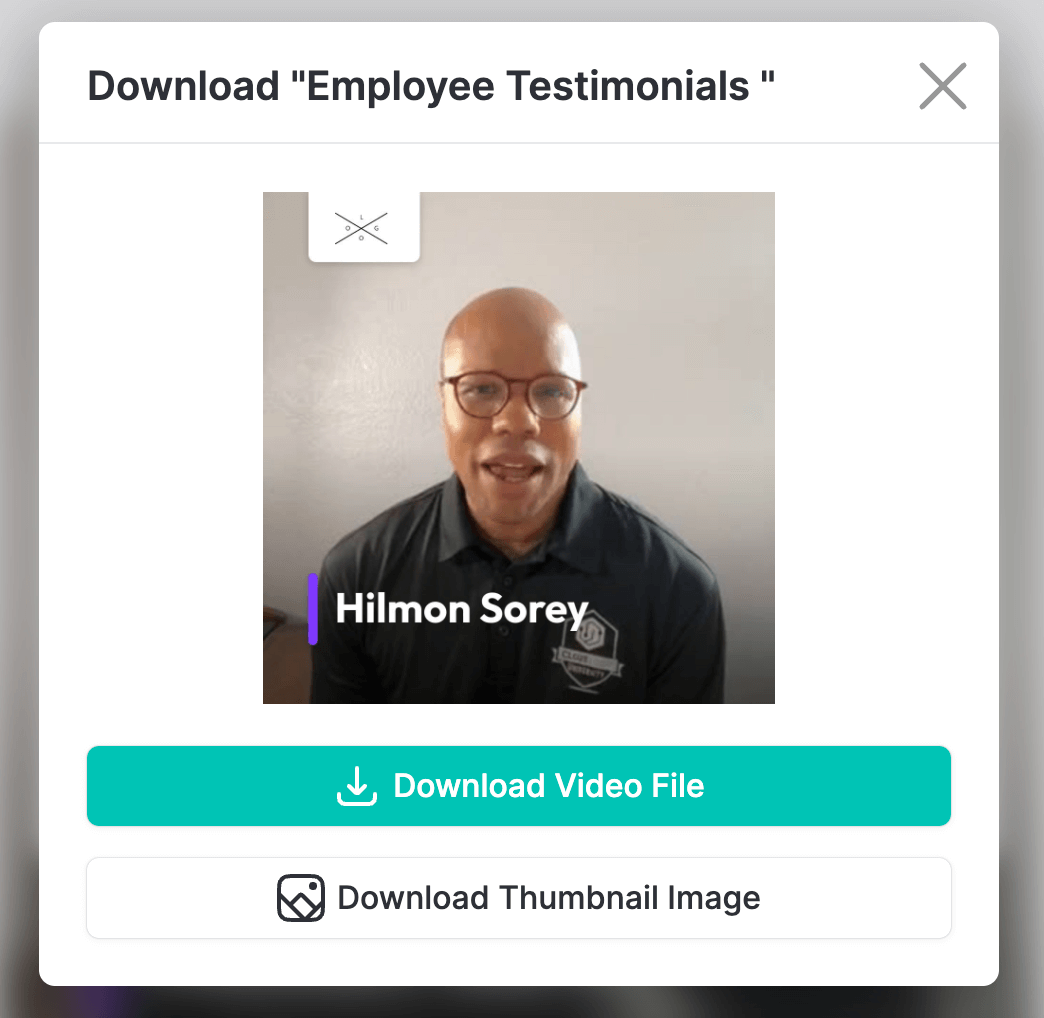
When you’re ready to share your video on Instagram, go to “Publish” and then “Share”.
To share on your Instagram feed, select “Download Video File” to get the video as an MP4. Then, open Instagram, find the video in your gallery, and create your Post, Reel, or Story.
If you want to use the video across your other social media channels, you can also upload it to Facebook Reels, TikTok, or YouTube, or share it with your Facebook, Twitter/X, and LinkedIn feeds in one click.
5 More Ways to Use Testimonials in Your Instagram Strategy
Creating Vocal Video testimonials for your business’s Instagram page is straightforward for you and your loyal customers. In general, though, it’s a little trickier to share reviews on Instagram than on platforms like Facebook or your Google Business Listing because Instagram doesn’t have any built-in review features.
This means you’ll have to work harder to locate your reviews, and take a creative approach if you really want to showcase them. So here, we’ve put together some more tips and tricks to keep trust-building user-generated content (UGC) front and center across your Instagram account.
1. Pin Testimonials to Your Grid
Pinned posts will stay at the top of your Instagram grid even after you add new content.
When you want to build your marketing strategy around reviews, keeping your favorite customer testimonials pinned ensures they’re one of the first things people see if they click through to your page — almost the same as a star rating grabs attention when someone visits your profile on a third-party review site.
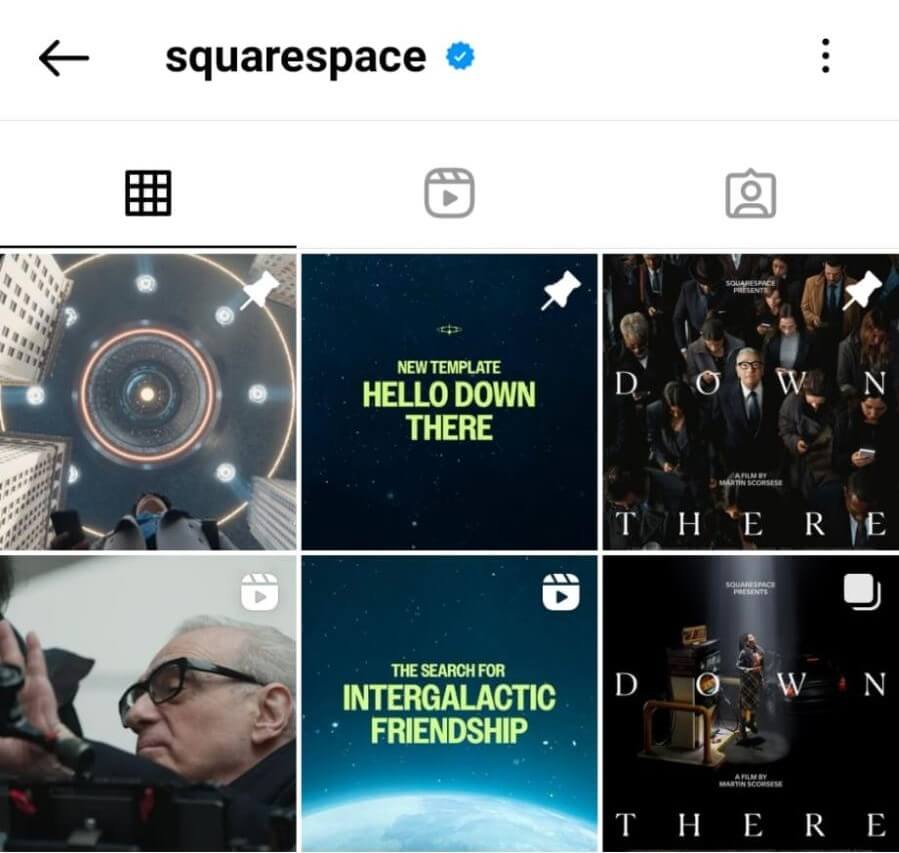
Squarespace uses pinned posts to advertise new features and templates, but this feature works equally well for keeping eye-catching reviews at the top of your page.
To pin a post, just go to your Instagram profile, click on the post, open the menu in the bar at the top, and select “Pin to your profile.”
2. Pin Glowing Reviews to Your Product Posts
The algorithm that decides the order of comments on Instagram can be unpredictable, but you can make sure that positive comments are the first thing people see when they open a post by pinning them to the top of the section.
This is an effective way to nudge someone toward their purchase decision, especially if the comment reinforces the positive message you’ve written in your caption. Even if you don’t pin the comment, responding to it will also bring it closer to the top of the comments section — and give the impression that you’re an engaged and proactive business owner.
To pin a comment, open the comments thread under the post, click and hold the comments you like, and select “Pin.”
3. Share Tagged Reviews in Your Stories
When your customers share a public post about your product in their feed, they may tag your company. You’ll get a notification whenever this happens, which makes it easy to share this UGC in your Stories.
This is also where it pays to choose a memorable handle or branded hashtag for your Instagram account. The easier it is for people to find your brand, the easier it is for them to tag you later.
To share posts that mention your brand, open the photo or video, tap “Add Post/Video/Reel to your Story,” and tap the arrow in the bottom right. Once you click “Share,” the post will appear as a fresh slide in your Story for the next 24 hours.
Plus, if you’re lucky, the original poster will repost your content and boost the number of impressions your profile gets even more.
4. Create a Testimonial Highlight
Remember, Instagram Stories Highlights appear at the top of your grid, almost the same place your customer reviews and star ratings would appear on your Amazon profile, for example. This makes Story Highlights a fantastic place to gather positive customer feedback and online reviews.
When you have a Story Highlight called “Reviews” or “Testimonials,” you invite people to find out more about what they could achieve with your product or service. The more authentic UGC stories you gather here, the more effective the social proof becomes.
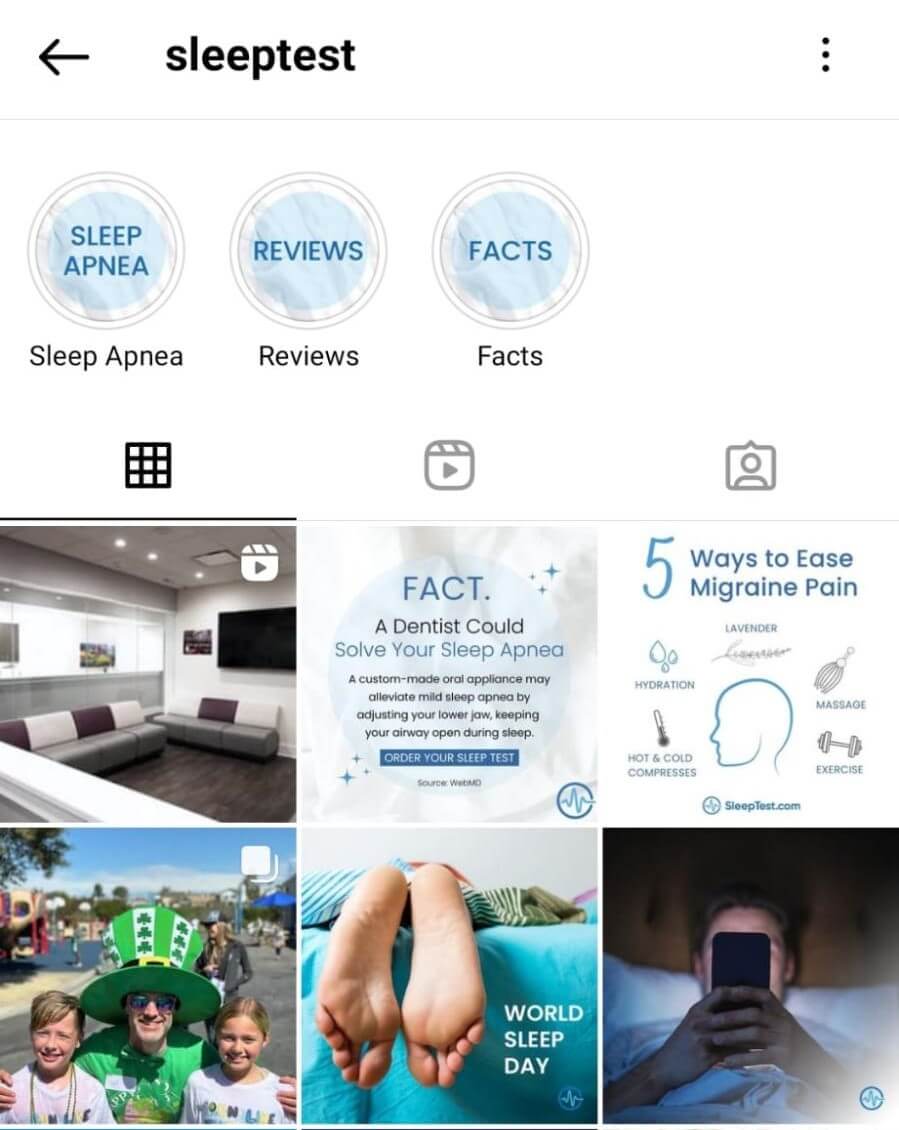
For example, Vocal Video user, SleepTest, collects reviews in a Story Highlight on their profile, alongside the other essential information visitors will need if they’re researching and comparing their treatment options.
Remember, to save a Story to a Highlight, just select the Highlight you want to add to, open the menu, click “Stories,” and choose the Stories you want to add. Once you click “Done,” the new stories will be saved at the end of the Highlight.
5. Link to Review Sites from Your Bio
You can’t add a URL to an Instagram post, so Instagrammers quickly get familiar with captions that include the words “Link in bio.”
While you could link to your website from your bio and hope people find their way to your customer stories or case studies, lots of businesses use a service like Linktree, Pallyy, or Tap.bio to create a landing page for their Instagram bio. If you take this route, you can add links to your product pages, your other social media profiles, and third-party review sites like Yelp, TripAdvisor, or TrustMary.
Create Authentic Testimonial Videos for Instagram, Effortlessly
When your goal is to shake up your Instagram presence with positive reviews from real customers, Vocal Video is the easiest way to ask for, collect, and format video testimonials that look at home on every part of your Instagram profile.
Simply create a video collector, let your satisfied customers know how much you value their feedback, and put them in control to create social media content that grabs the attention of new customers and boosts your brand’s credibility online.
Get started with Vocal Video for free today. Contact us to book a demo, or sign up for your account now.