Vocal Video effortlessly collects testimonial videos from your customers, employees, event attendees, and others via our branded video collectors.
But sometimes, you may want to incorporate video clips that weren't directly collected by one of your video collectors. For example:
- You might have video testimonials that you collected before you knew about Vocal Video that you want to combine with testimonials collected by Vocal Video.
- You might have video clips that you choose to record at a live event or with a professional videographer.
- You might have b-roll or other footage you want to mix into your testimonial videos to provide visual variety.
- You may have a custom logo animation that you want to use instead of our automatic logo animations.
Good news – now you can upload external video clips like these and easily add them to your Vocal videos.
How it works
Uploading your clips
To upload external video clips, first go Settings -> Uploaded Video Clips and click the big Upload Video Clip button:
You'll be asked whether the clip you're uploading represents someone speaking, or some other type of footage. If you're uploading a clip of someone speaking, you can specify how you'd like them to be attributed.
After you upload your file, it'll take our system a few minutes to process it – your file has to be transcoded into a common format so it can be incorporated into our realtime video editor, and we'll also automatically transcribe it to generate subtitles (if there's any speech in the video). If you don't want to wait, we'll email you when the process has finished.
A couple things to keep in mind:
- For most situations, we recommend uploading clips without background music – more on that below.
- Uploaded video clips are included in your video storage total.
Using your uploaded clips
If you're incorporating your uploaded clip into a multi-scene draft video, open that video, click 'Add a Scene', select 'Video', and then click the tab at the top to browse your uploaded video clips:
Once you add your uploaded video clips, they'll appear as video scenes at the end of your video. Drag and drop your scenes to reorder them however you want, then click over to the preview tab to see how it all plays back.
You can also trim these scenes, apply filters, edit subtitles, and change the attribution just like on any other video scene:
If you want to start a new video from one of your uploaded clips, or if you want to quickly publish an individual clip, simply find your clip in the uploaded clip library and click the + button to create a new draft video based on that clip.
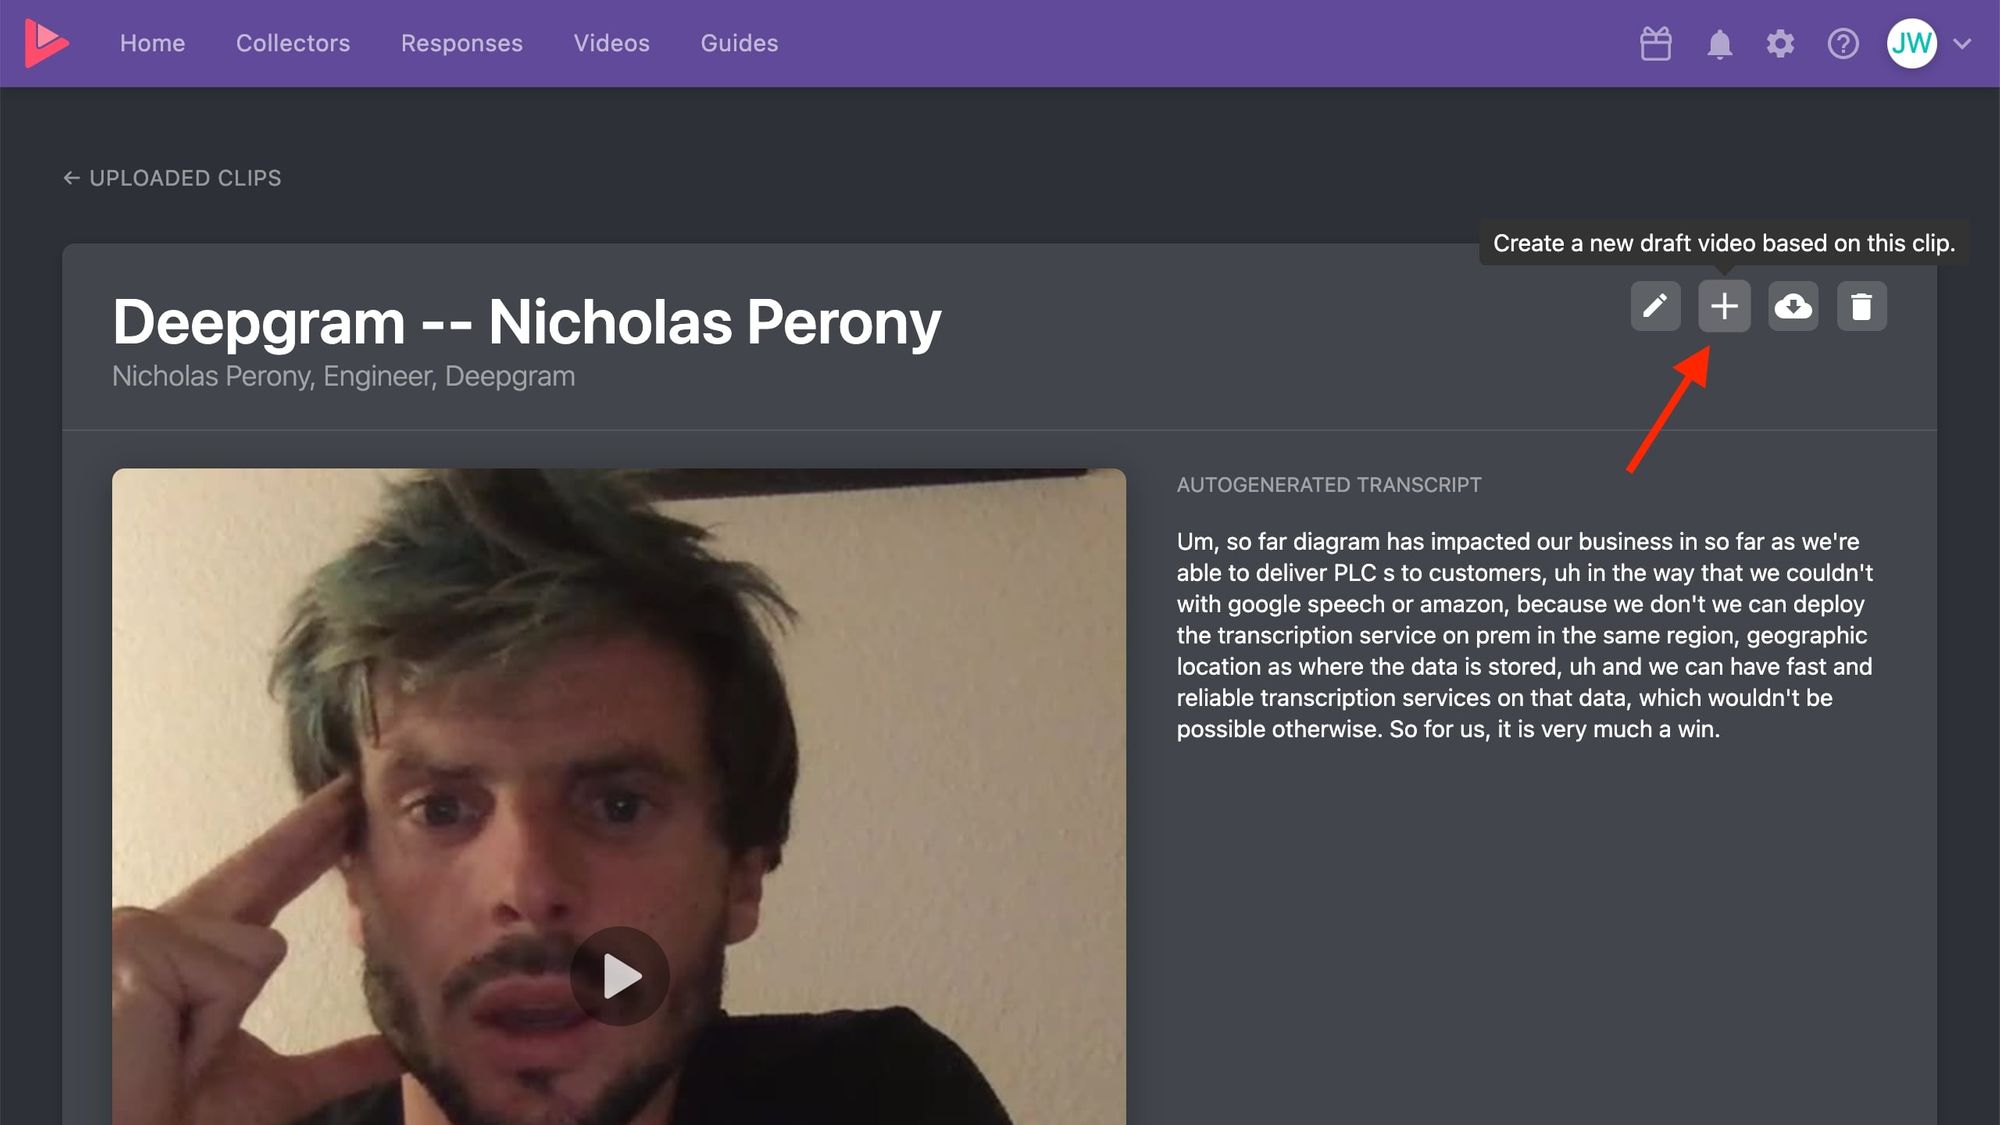 Creating a draft video from an uploaded video clip.
File guidelines & limitations
Here are some guidelines for your video uploads:
- File types: MP4, MOV, or WebM
- File size: 500mb or under
Keep in mind, uploaded video clips are included in your video storage total.
A note on background music
We typically recommend uploading video clips without background music. Why? Because if you're going to combine your uploaded video clips with other scenes, the background music won't play smoothly across your whole video.
To apply background music to your videos, use one of our 20+ ready-made soundtracks, or upload your own custom background music file when editing your draft videos.
Need help, have questions?
If you have questions about the uploading process, or have issues getting your uploaded video clips to work, don't hesitate to reach out to us at support@vocalvideo.com.